How To Remove Acrylic Nails Without Damaging Your Natural Nails

There’s something undeniably appealing about a fresh set of acrylic nails—they add length and polish to your natural nails while also creating endless opportunities for experimenting with nail designs and colors. Even with new trendy mani options like dip powder and builder gel nails available, our love for acrylic nails will never fade. (And neither will they—acrylics have some serious staying power).
The flip side of that staying power is figuring out how to remove acrylic nails without damaging your natural nails. You definitely can’t rip them off (you’ll regret it if you try). And while TikTok is full of hacks for removing acrylic nails, these viral techniques don’t always work.
Ultimately, heading to the salon for professional removal is the safest way to remove acrylics. But if that’s not in the cards, rest assured that safe and effective DIY acrylic nail removal techniques do, in fact, exist. Here, we’ll explain how to remove acrylic nails at home without damage and offer some of our best tips for keeping your nails strong, healthy, and nail art-ready.
How Do I Remove Acrylic Nails at Home?
There are a few safe ways to get acrylic nails off at home, including options that don’t require acetone. And if you’re at all intimidated by the thought of channeling your inner nail tech, don’t be: Learning how to remove acrylic nails without damage is way easier than you might think.
Whether your go-to is a classic French manicure or you’re switching it up with eye-catching neon nails, the below removal options should work for you.
What Is the Best Way To Remove Acrylic Nails?
One of the most common ways to remove acrylic nails without damaging your natural nails is an acetone soak. This is what you’ve likely experienced at salons, but it can be easily replicated at your kitchen table.
What you’ll need:
• Nail clippers
• Nail file
• 100% acetone nail polish remover
• Petroleum jelly
• Cotton balls
• Aluminum foil
How to remove acrylic nails with acetone
Step 1: Clip
Start by using a nail clipper to cut excess length from your acrylics. The less nail that’s left to work with, the better.
Step 2: Prep
File and buff the tops of your nails to remove any nail polish that was applied on top of the acrylics. Then, prep your cuticles for an acetone soak by applying cuticle oil or petroleum jelly to the base of your nail beds and your fingers (this helps prevent your cuticles from drying out).
Step 3: Wrap and soak
Saturate a cotton ball with acetone nail polish remover and place it on top of your acrylic, covering the nail completely. Wrap a piece of aluminum foil around the tip of your finger to cover your nail and the cotton ball, and repeat for each nail.
Step 4: Wait
Now comes the easy part. Sit back and relax for about 20 minutes while the acetone does its thing (we suggest taking the opportunity to find some inspo for your next nail look).
Step 5: Flake away (or soak again)
Once the time is up, gently lift the aluminum foil off from one of your nails. The acrylic should be soft enough that you can flake it off without too much effort. If it’s not quite there yet, leave your nails to soak for an additional five to 10 minutes.
How Do I Remove Acrylic Nails Without Acetone?
If you’re not a fan of using acetone to remove nails, we have a DIY tutorial to keep handy. This acrylic nail removal technique is a snap sans acetone and only takes a little more time to complete.
How to take off acrylic nails without acetone
Step 1: Clip
Again, begin by clipping your acrylics as short as possible.
Step 2: Tweeze
Using a pair of tweezers or a cuticle stick, gently pry and lift the edges of your acrylics. The key word here is gently. Try to force it, and you’ll be in for a world of pain—plus almost certain nail damage.
Step 3: Soak
Next, pour some acetone-free nail polish remover into a bowl, making sure it’s deep enough that you can fully submerge your fingertips. Let your nails soak for 30 to 40 minutes or until the acrylics begin to noticeably loosen.
Step 5: Peel
When the acrylics begin to lessen their grip, use your tweezers to gently pull them off of your nailbeds. If you have to force it, soak your fingers in the polish remover a bit longer.
How To Take Off Acrylic Nails Quickly
If you don’t have time to soak your nails, you can use floss—waxed or unwaxed—to take off acrylic nails when they’re growing out. While this method will get off acrylic nails fast, it can lead to nail damage if done too soon. So make sure those acrylics are really hanging on by a thread (get it?) before trying this one.
How to take off acrylic nails quickly without soaking them first
First, ensure your nails are ready for removal—they need to be noticeably loose and grown out for this method to work. If they are, gather your tools and get to work.
What you’ll need:
• Cuticle stick
• Dental floss sticks
Step 1: Lift up
Grab your cuticle stick and gently lift the edges of your acrylics with it. If your acrylic nails have already begun to lift, you may not need to do much for this step.
Step 2: Pop off
After the edges of your acrylic nails have lifted, insert a piece of dental floss under the base of the acrylic. Carefully move the floss up the nail in a sawing motion until the acrylic pops off.
What Is the Safest Way To Remove Acrylics?
While there are several ways to remove acrylics, the quickest and most effective way is to visit the salon and have a professional do it for you. You’re less likely to experience unwanted damage when you visit an expert—simply because they have access to more powerful formulas and tools than you have at home.
Barring a salon visit, your second-best option is the at-home acetone soak. Work slowly, be gentle, and exercise patience: Ultimately, the slower you go, the less likely you are to damage your nails or cuticles.
How To Care For Your Nails After Removing Acrylics at Home
Taking care of your natural nails is always important, but especially crucial after you’ve removed your acrylics. Follow these tips to ensure you’re left with strong and healthy-looking nails.
Step 1: Buff your nails
After you remove your acrylics, you may be left with some residue from the bonder. Use a glass nail file to buff the tops of your nails and remove that residue. This will keep your nails smooth and free of any jagged texture that can snag clothing, skin, and other delicate objects.
Step 2: Treat your nail beds
Post acrylic removal, your cuticles may need a little TLC. Apply cuticle oil around the perimeter of your nail to help soften and care for them (and your entire nail bed).
Step 3: Hydrate your hands
Finally, show your hands some love by reaching for a hydrating hand cream.
What To Use on Your Nails After Acrylic Removal
Whether you’re committed to at-home removal or only go the DIY route in a pinch, it’s important to pay attention to your hands and nails. Here, learn how to care for nails so they stay strong and healthy-feeling day after day.
Cuticle oil
Cuticle oil is an essential part of nail care (aftercare especially) and should be used before, during, and after a manicure to keep your cuticles and nail beds soft and moisturized. Consider keeping a bottle in your nightstand and making oiling your cuticles part of your nightly pre-bed ritual.
Hand cream
No matter how safely you remove your acrylic nails, the process can leave your hands and cuticles feeling dry. To counteract any dryness, slather your hands in a hydrating cream or lotion at least once a day (though more often can’t hurt).
SPF
You likely know that you should be applying SPF to your face and neck, but don’t neglect your hands. While acrylic nail application doesn’t require a UV lamp to cure the way gels do, it’s still important to keep your hands protected from damaging rays.
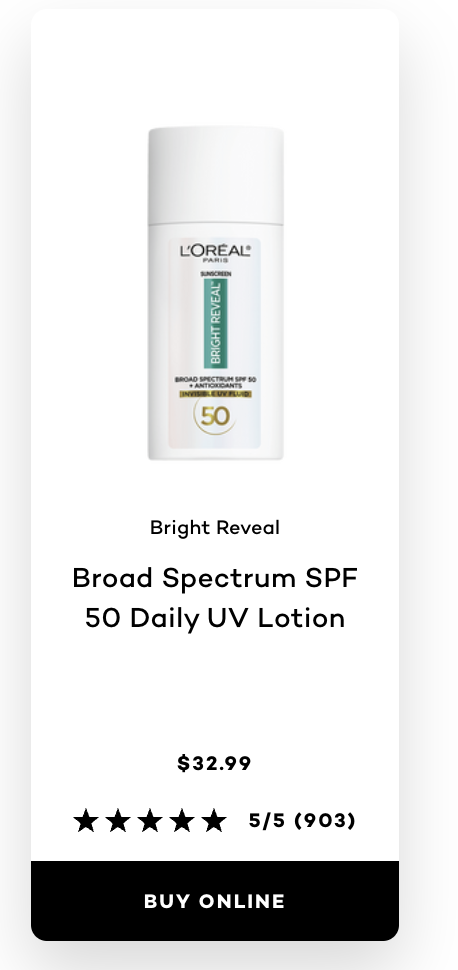
We love the L’Oréal Paris Bright Reveal Broad Spectrum SPF 50 Daily UV Lotion because it has a lightweight feel and offers broad-spectrum protection against UVA and UVB rays.
Shop the Product


